The evolution process of my computer building skills
Why, oh why did I name my PC Genisys? The spelling of the name should be somewhat of a giveaway if you’re a fan of the Terminator series. Honestly, it is just a fun parallel comparison of how Skynet became improved and evolved to something new based upon the original.
My favorite processor has gone from the dual core AMD 64 x2 processor to an AMD Ryzen 7 1700. AMD processors have evolved greatly, and I am still an AMD fanboy. While my first PC I ever owned was a 486dx, the first PC I ever built was with an AMD 64 processor.
For this blog I want to list my PC builds, and their evolution’s leading up to my new PC: Genisys. I want to share my experience building that PC, some mistakes I made, and changes I plan to implement.
My first PC took me a few years to build as I did not have a lot of money, and I only wanted the best parts. I had no idea how fast PC parts improve, get discontinued, and upgraded, sometimes in a matter of just six months. As far as my first PC is concerned, I still have some of the original parts: the motherboard, and I think the processor as well. The board was an MSI K9N Diamond with an AMD Athlon 64 x2 processor and OCZ Gold 4GB(2x2GB) DDR2 SDRAM. The hard drive I chose was a WD Velociraptor, which had increased RPM 10,000 vs the typical 7200.
The first graphics card I placed into it was a cheap card I bought from eBay. I continued using my mouse, keyboard, and the old-fashioned bulky CRT Compaq 13” monitor. I still have the case- a little treasure I have a hard time getting rid of. It was an APEVIA MX-Pleasure. That PC case was roughly a 40+ pound beast, or at least it feels that way. A full ATX Steel case. I am still undecided if I will one day modify the case or not.
Just as the T-800 was upgraded to the T-850, so did my PC. The first of which was the graphics card. I heard a loud pop, and when I opened the side of my case, there was this dark stinky liquid that had been sprayed against the case door. A cap on the card had blown. I guess that is what you get buying cheap unknown products off of eBay. This not only forced me to buy a new card, but it sparked my interest in repairing and modifying PC components. I did successfully solder in a new cap onto the card. Windows XP had loaded up, but while playing World of Warcraft it didn’t seem to run as stably. However, it still ran. The upgrade was a GT220, which was a purchase I would later somewhat regret. The GT220 loves overheat and the fan is just obnoxious. I thought it was funny that I paid $50 for it at Best Buy, and a year later it was selling just over $100.
The next upgrade was more RAM for my PC. The board supported up to 8GB of ram and I only had 4GB. I bought two more modules of the coveted gold-plated OCZ RAM. I don’t know why I didn’t know about clock timings or anything like that. Having two different sets of RAM I think probably caused some lag and frame issues that I never really got a chance to test.
My desire to learn how to repair components ended up costing me my coveted K9N Diamond board. I bought some broken electronics off eBay for dirt cheap. I made the mistake of plugging the power cord of a broken Blu-ray player into the same power strip as my PC. I heard some buzzing and out went the lights. My PC would boot up, but it was as if it was in safe mode- only it wasn’t. It wasn’t loading any of the proper drivers for some reason. It wouldn’t even recognize that I had a LAN or wired internet connection. After hours of what I thought was proper research, I assumed I was buying a newer version of the same board. There was an updated version of the K9N Diamond, but I ended up getting another board that was a bit different. It did not have the same features I missed from my board. This was my first lesson in being misled on an eBay purchase.
My next upgrade purchase turned out to be a failure of sorts. This was my first lesson in understanding sockets more. Before I had replaced my board, I had actually bought another processor in an attempt to upgrade. I also learned something about processors and cores. I learned about caches. I was on eBay and came across these black edition processors that had three caches and not two like the one I had. I somehow ignorantly thought the caches were related to the cores. So I was convinced it was like this experimental tri core processor. It wasn’t very long after the Kuma series that a quad core processor came out. So it only strengthened my belief sadly.
I’ve since then learned about cores and caches. More importantly I also learned about sockets: both the old board and new one were AM2 sockets not AM2+, which is what I needed to run the Kuma processor.
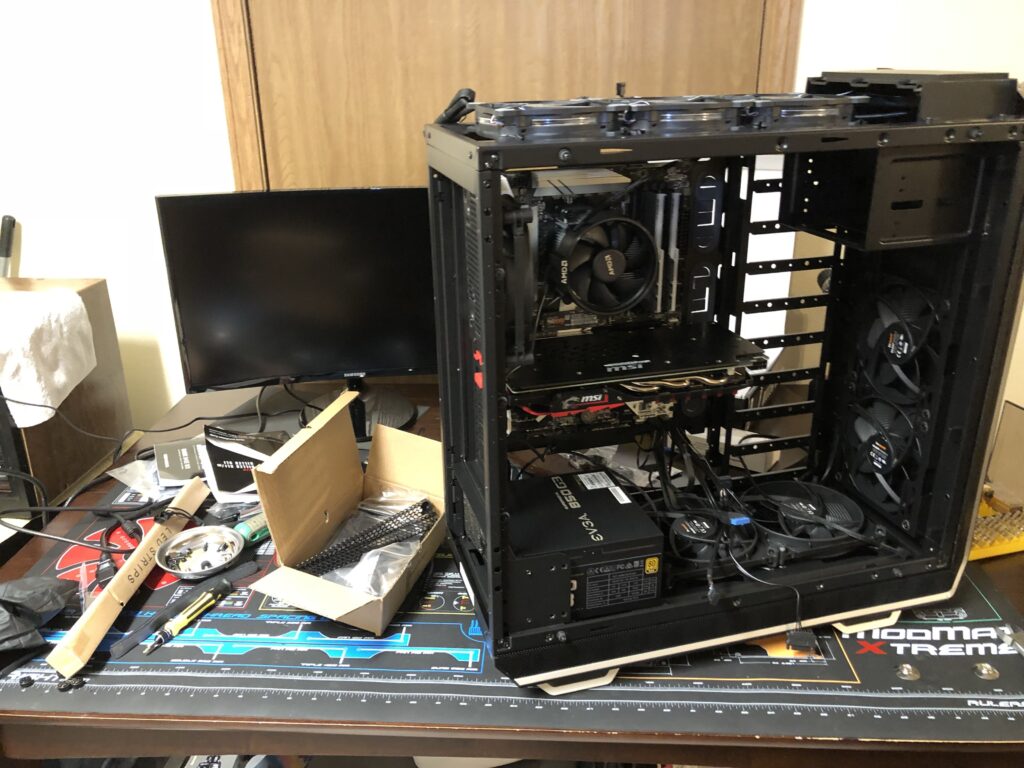
At this point my T-850 turned into a T-3000. This is where Project: Genisys came alive. Just like in the movie Gensisys , this was a whole new program but based upon the same principle as Skynet. I made a few more mistakes when building this PC. I will go over more of these after I discuss my first purchase options and subsequent upgrades.
Case: Dark Base Pro 900
CPU: Ryzen 7 1700
Board: ASRock x370 Killer Sli/ac
Ram: G.Skill TridentZ RGB 16GB(2x8GB) DDR4(3200)
M.2 SSD: Samsung Evo 960 250gb
HDD: Toshiba 2TB
Graphics Card: MSI GTX 1060 Gaming X
PSU: EVGA SuperNOVA 850 watt G3 80+ Gold
Within three months, I added/upgraded the graphics to a 1080ti version of the same card. While the board had SLI and crossfire capabilities, I realized that was not a feature available on SLI when the card series were different. My curiosity made me wonder if I needed to sell the 1060 or if I could utilize it. So I ran both cards and offset the PhysX commands on the 1060. I found another use for running both cards. I could play, stream, and record on the same PC without losing quality while operating OBS. OBS, as it turns out, allows you to designate which devices do the encoding.
There were some things that I had not realized when I chose this build. One of the issues I ran into was not realizing the limitations of Zen gen 1 and RAM speed compatibility. Using the XMP profile, I successfully changed the RAM speed to 3200, which is the advertised speed. I later bought another matching kit in order to have 32GB of RAM.
This is when I ran into my next issue. I first experienced a boot loop. Once I managed to get out of that, I went back to modifying the XMP profile. In order to get it to run stably with all 32GB I had to lower the speed to 2133. I made the mistake of not knowing which set was which, and they were all mixed. I was not able to test the RAM kit to see if I needed to do an RMA. However, I did come across a possible fix that I have not been able to test. A YouTuber mentioned turning up the dram voltage to possibly 1.3.
Update: Since I first wrote this rough draft, I have gone back and tested my RAM. Changing the dram voltage still had no effect. Upon further inspection I realized that I had bought a second set of RAM so much later that it seems the RAM set may have already been updated. I might invest in a full four sticks at 3200 in the future just to see if I can circumvent that.